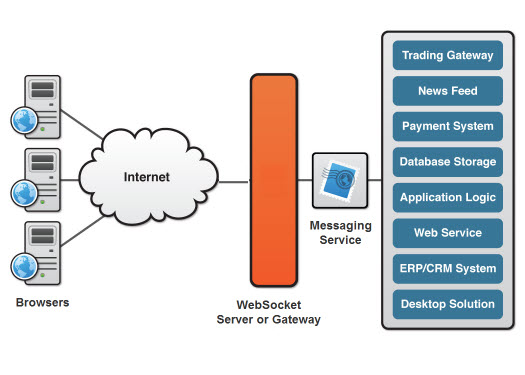
WebSockets is an HTML5 feature providing full-duplex communications channel over a single TCP connection. This enables building real-time applications by creating a persistent connection between the browser and the server. The most common use case for Websockets is when adding a chat functionality to a web application. This image below gives an apt pictorial representation for websockets (ref: http://www.websocket.org)
Recently we performed a security assessment of a fairly complex application with good number of menu options and features. The application was leveraging web-sockets for most of its operations. This effectively meant the the logs were not to be found in most of the http-proxy logs.
On visiting the homepage the site loads a static HTML page along with some JavaScript and CSS files. After this, the entire communication shifts to Websockets. A websocket connection is created to the server and this loads all the visible HTML sections of the website. Clicking on a link or submitting a form triggers the page to send several WebSocket messages to the server. The server inturn processes these messages and sends new HTML content through WebSocket messages, which is then displayed in the browser.
When websocket messages were captured it was evident that the number of messages were overwhelming. Adding to the fact that there was a short interval keep-alive message exchange after every 1 second. The existing tools were not up to the task. Hence I had to add a Websocket Message Analyzer and WebSocket client to IronWASP to understand this Websocket implementation and then fuzz it. You can read about it here.
On testing the app we discovered that it was vulnerable to Cross-Site WebSocket Hijacking (first discussed by christian schneider http://www.christian-schneider.net/CrossSiteWebSocketHijacking.html). I will discuss the impact of this issue first before talking about how to test for it. The test for this is so simple that you can and must do it in the first 10 minutes of testing an application that uses Websockets.
It should be understood that Same Origin Policy (SOP) is NOT enforced on websockets via browser (pages loaded over SSL are prevented from making non-SSL WebSocket connections in some browsers). The application we tested relied on http cookies for session validation. The messages sent through WebSocket from the browser did not contain any Session ID or other random parameter.
So this means that if an user is already logged in to the vulnerable application from his/her browser and has http://attacker.com open in a different tab then http://attacker.com can try to create a WebSocket connection with the vulnerable application and the valid authenticated Session ID will be sent (by the browser) along with this request. So the WebSocket connection, which is now established by http://attacker.com, will have the same level of access as the WebSocket created from within the vulnerable application.
As our entire application was running over websockets, hijacking the WebSocket would be equivalent to hijacking the user’s session. So in essence the impact was equivalent to that of Persistent Cross-Site Scripting.
If you thought that this is bad then you would be surprised to hear that in some cases Cross-Site WebSocket Scripting can even lead to remote code execution on the user’s system, like in the case of IPython Notebook.
Hopefully by now you are convinced that this is the first check you must perform on an application using WebSockets. Fortunately testing for this is very simple. You would need three pieces of information to perform this check:
- The URL of the WebSocket connection. This starts with either ws:// or wss://
- The Origin header that is used in creating this connection. This will be the Origin of the page that is making the making the WebSocket connection
- Some messages sent by the browser and the server so we know what a normal connection looks like.
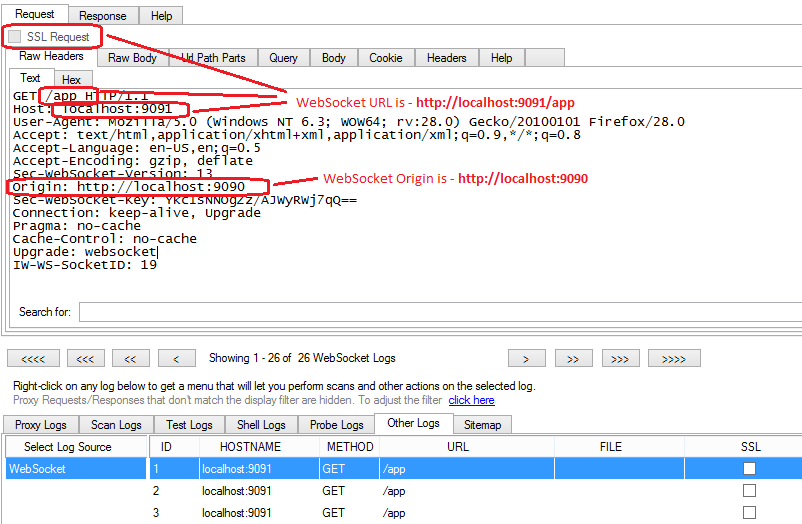
The image below shows how you can get the Origin and WebSocket URL values from IronWASP logs.
Once you have this information then you can do a check for Cross-Site WebSocket Hijacking in a few different ways. I will explain three simple methods:
- Via Proxy Tools like Burp
It should be noted here that burp has interception and recording feature for WebSockets. ZAP and IronWASP are the only software so far (which I am aware) which has the capability to resend websocket requests.
In burp as already stated we cannot repeat the websockets messages however we could still test for it in a limited way by checking if a WebSocket handshake succeeds. To test this we need to identify the websocket upgrade request which occurs over http(s) connection and can be repeated.
Below screenshot shows a burp Repeater log showing Request and response for a valid request for websocket connection.
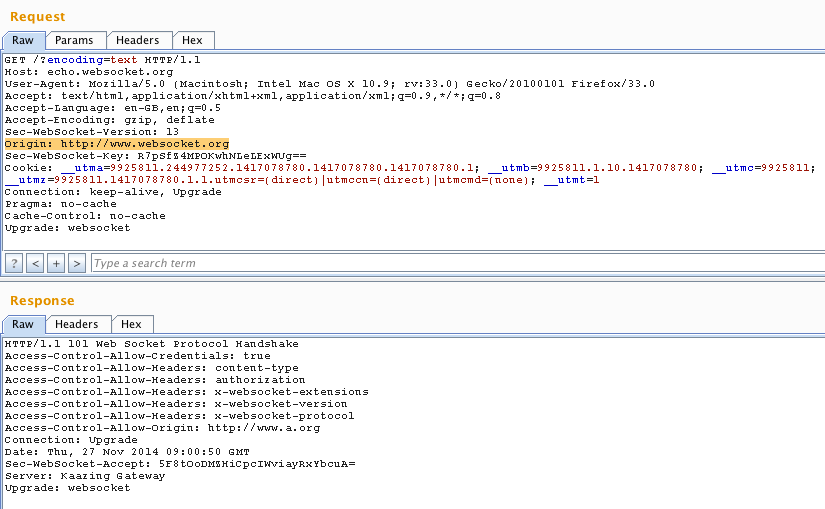
To test this flaw all we need to do is to send another request with a modified Origin header. If we received 101 Web Socket Protocol Handshake then it means the WebSocket connection has been established.
If the connection is not established then then it means the application is secure as it is rejecting WebSocket connections from external Origins. If the connection is established then we would have to perform further checks to confirm if the application is vulnerable to Cross-Site WebSocket Hijacking. Even if a connection is established the application is only vulnerable when it responds to WebSocket messages like it does for a connection from valid Origin. This is because the developer could have placed the Origin verification logic along with the access control checks. So the connection would still be established but external Origins won’t have access to authenticated data in such cases which is a good thing.
ZAP has the ability to resend messages but as far I am aware it does allow the tampering of the Origin headers. The methods shown below explain how you can perform a more thorough check for CSWSH.
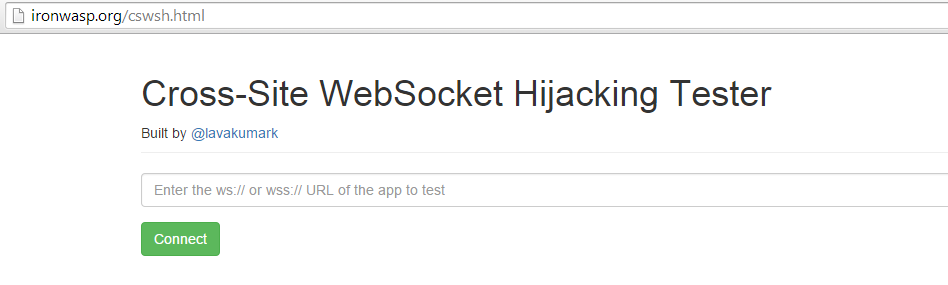
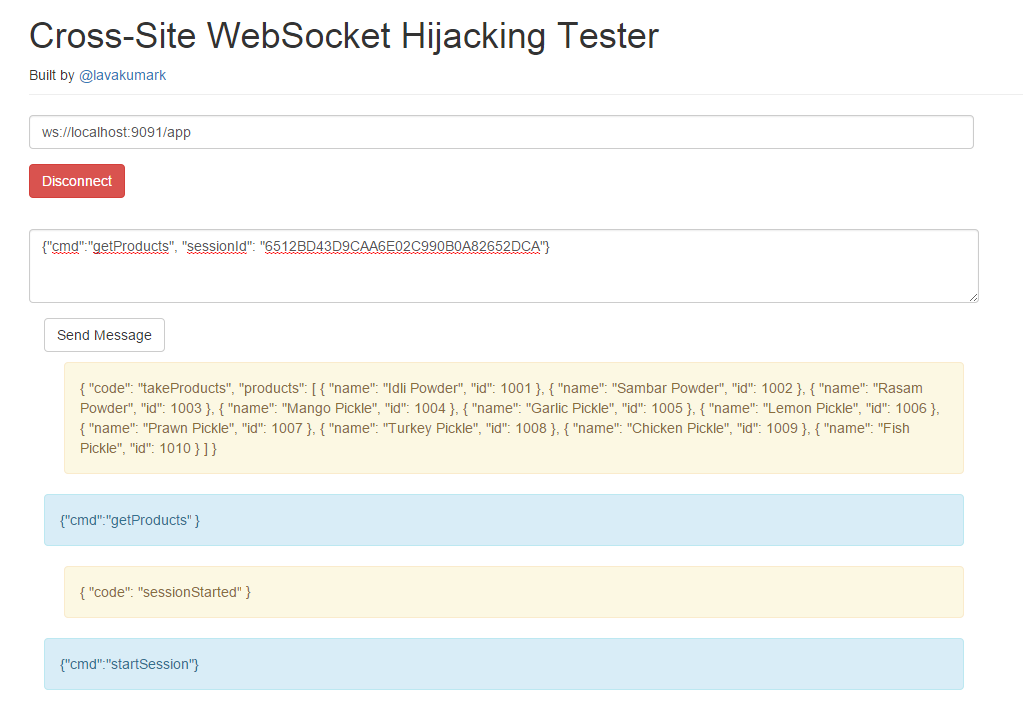
- Using the Cross-Site WebSocket Hijacking Online Tester
Open the application to test in your browser and login to it. After this visit, open in a different tab, enter the WebSocket URL and hit ‘Connect’. Once the connection is established you must be able to send messages to the server from this page. Send messages that were captured from a valid session and see how the server responds. If the server responds in the same way as it did for the valid session then it most likely is vulnerable to Cross-Site WebSocket Hijacking.
3) Using IronWASP
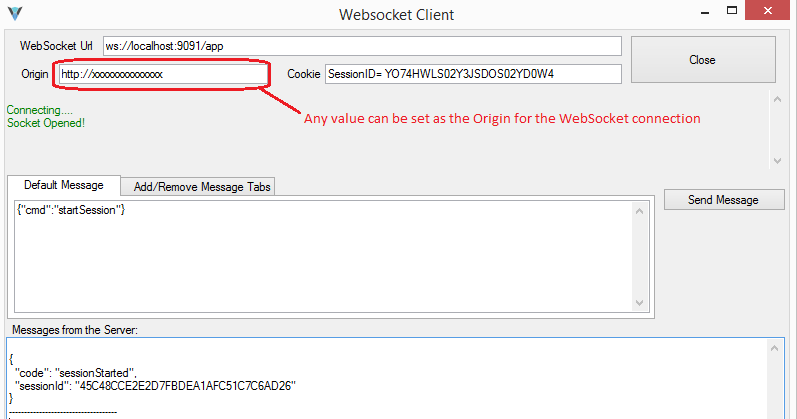
Using IronWASP’s WebSocket Client
When testing with the method described above the Origin that is sent to the server is http://ironwasp.org. If you want more flexibility in setting the Origin value then you can make use of IronWASP’s WebSocket Client utility. This let’s you define any Origin value you want and test the WebSocket connection. 
This could come in handy in situations where the application might allow WebSocket connections from the application’s public Origin and along with connections from Origin values that are either equivalent to localhost or some internal private IP address. This could be to support developers and internal testers of the company. By using IronWASP’s WebSocket client you can try combinations of localhost or private IP addresses to see if it works. If it does then exploiting this issue in real-world scenarios could be a little tricky. For example if the application allows http:/127.0.0.1:8080 as the Origin then this could be exploited if the victim has a local webserver running on port 8080 which has an application with Cross-Site Scripting. If it does then an attacker could first perform an XSS on this locally host application and them from there create a WebSocket connection to the actual target server.
Automating the check with IronWASP’s WebSocket API
If you are going to check with different combinations of localhost and private IP addresses for the Origin header then it might be easier to automate this check with a custom script. IronWASP gives you the ability to script this in either Python or in Ruby.
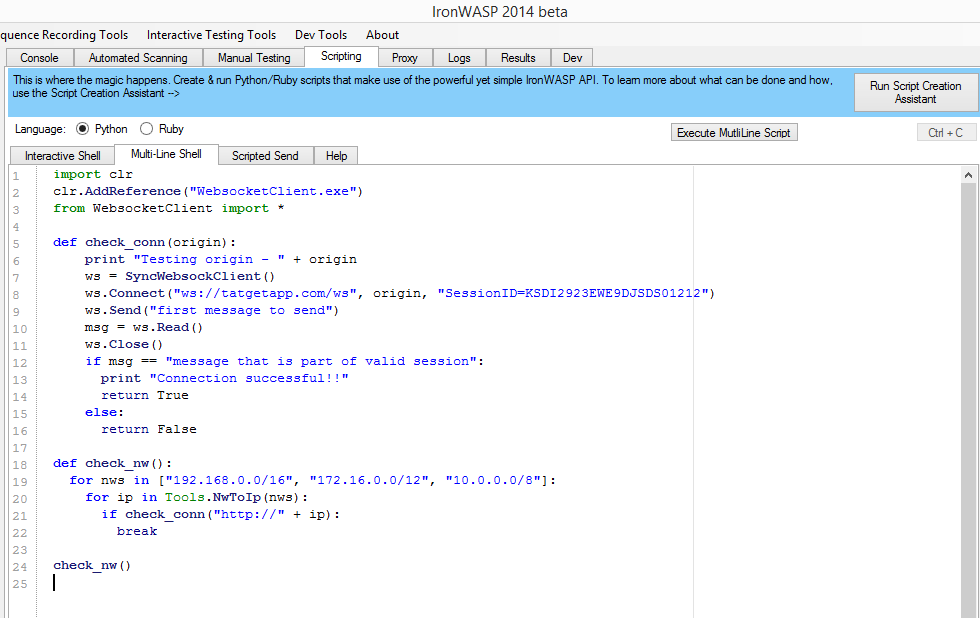
For example the following script would check every single IP in the private IP address space as a Origin header value to see if it is accepted.
import clr
clr.AddReference("WebsocketClient.exe")
from WebsocketClient import *
def check_conn(origin):
    print "Testing origin - " + origin
    ws = SyncWebsockClient()
    ws.Connect("ws://tatgetapp.com/ws", origin, "SessionID=KSDI2923EWE9DJSDS01212")
    ws.Send("first message to send")
    msg = ws.Read()
    ws.Close()
    if msg == "message that is part of valid session":
      print "Connection successful!!"
      return True
    else:
      return False

def check_nw():
  for nws in ["192.168.0.0/16", "172.16.0.0/12", "10.0.0.0/8"]:
    for ip in Tools.NwToIp(nws):
      if check_conn("http://" + ip):
        break

check_nw()